I had to update the glibc library to 2.4 (or above) on my system because the netbeans mobility pack emulator depend on this library. On most new distributions, like slackware 12, debian , and ubuntu this is no problem since they all use glibc version > 2.4
To install the netbeans SW on an updated system just follow these steps:
1. Change to root
su -
2. Check that you have everything
ls *.bin
jdk-1_5_0_12-nb-5_5_1-linux-ml.bin
jdk-6u2-linux-i586.bin
jdk-6u2-nb-5_5_1-linux-ml.bin
netbeans-5_5_1-linux.bin
netbeans-c++-5_5_1-linux.bin
netbeans_mobility-5_5_1-linux.bin
netbeans-profiler-5_5_1-linux.bin
sjsas_pe-9_0_01-nb-5_5_1-ml-fcs-bin-linux.bin
sun_java_wireless_toolkit-2_5_1-linux.bin
3. chmod all the binaries
ls *.bin|xargs chmod u+x
4. Install the jdk
./jdk-6u2-linux-i586-rpm.bin
The reason for using this file and not the tarball is that it actually contains rpm's. These rpm's will ensure that the netbeans installer(s) can see the new jdk you just installed.
5. Install netbeans 5.5.1 package
./netbeans-5_5_1-linux.bin
6. Install the c/c++ add on
./netbeans-c++-5_5_1-linux.bin
7. Install the profiler
./netbeans-profiler-5_5_1-linux.bin
8. Install the Mobility package The actual CLDC sdk :)
./netbeans_mobility-5_5_1-linux.bin
This way all netbean components are placed in:
/opt/netbeans/
To try netbeans IDE create a link/symlink/set the path/ or execute the file: /opt/netbeans-5.5.1/bin/netbeans
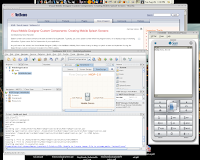
This is the final result of a generated test midlet running in the netbeans simulation environment:

My system was a modified redhat ETP, but I guess that it'll run on most rpm based machines. Perhaps I should try a slackware installation to verify everything.
Problems:
Installion went fine, so did creating a project test midlet. If you could execute the midlet and simulate it youre done. But if executing the emulator failed due to wrong GLIBC version, follow the step below as well.
I had to update glibc on my instalation to 2.4. This is not a trivial task as it may break your entire system. And yikes, the glibc 2.4 installation failed, some issues with one og the gcc compilers libraries :( So I installed the latest gcc as well. And yes it takes a while!
Read the following howto carefully.
The fast way to do this is to find the appropriate rpm's somewhere and then install these using the --nodeps option. This is because the rpm's have interdependencies that cannot be resolved.
The full expressing looks something like this:
rpm -Uvh --nodeps binutils-2.16.91.0.6-5.i386.rpm glibc-common-2.4-11.i386.rpm glibc-2.4-11.i686.rpm glibc-headers-2.4-11.i386.rpm glibc-utils-2.4-11.i386.rpm glibc-devel-2.4-11.i386.rpm gdb-6.3.0.0-1.134.fc5.i386.rpm gcc-4.1.1-51.fc5.i386.rpm gcc-c++-4.1.1-51.fc5.i386.rpm
Notice the above is quite rough on your system.! You can actually break the systems stability if you do not resolve all the dependencies for all the packages.

1 comment:
Thanks for the information. It's useful. I'm starting programming on Java language. Bye.
Post a Comment