April 27, 2016

Installing routersploit in Kali

      ______            _            _____       _       _ _
      | ___ \          | |          /  ___|     | |     (_) |
      | |_/ /___  _   _| |_ ___ _ __\ `--. _ __ | | ___  _| |_
      |    // _ \| | | | __/ _ \ '__|`--. \ '_ \| |/ _ \| | __|
      | |\ \ (_) | |_| | ||  __/ |  /\__/ / |_) | | (_) | | |_
      \_| \_\___/ \__,_|\__\___|_|  \____/| .__/|_|\___/|_|\__|
                                          | |
          Router Exploitation Framework   |_|

      Dev Team : Marcin Bury (lucyoa) & Mariusz Kupidura (fwkz)
      Codename : Bad Blood
      Version  : 2.0.0

The routersploit framework. Get your free copy now. The installation is straight forward, just follow the instructions from in link. Then check your router using the vulnerability scanner.

# cd routersploit
# ./rsf.py

The above command starts routersploit and you'll see the amazing ASCII graphics as shown in teh top of this page. Routersploit follow the Metasploit command scheme.

rsf > use scanners/autopwn
rsf > set target your.router.ip
rsf > run

Now you're done, mine's apparently not vulnerable to any known exploits. If you find some issues then you'd better check and report them. Before someone less friendly checks them for you.


Kali virtualbox wireless network with a EW 7612 UAn USB dongle

Running Kali from a virtualbox kinda limits the wireless LAN access. Since all interfaces on your host machine is treated as wired cards by the virtualbox.

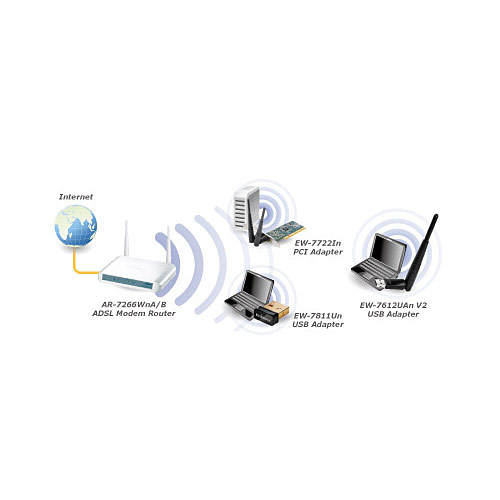
The solution is to get a wireless USB network adapter. Mine is version V2 of the EW-7612UAn bases on the RTL8192SU chip-set and has the USB ID 7392:7822, in case you wish to check for aircrack-ng compatibility.


Before you boot your Kali box with the USB dongle tugged in. Be sure to create a USB entry, to ensure that the guest is the only machine claiming the USB dongle. Check the screenshots below to see how to create an entry.

Select USB, from the settings main menu.
Select + to add a new USB entry

Details for you new USB device.
Now that you're sure the wireless dongle is claimed by the guest machine, feel free to boot the Kali box. When your box is up and you're logged in, check to see if your wireless USB dongle is recognized. Here's a bunch of commands for playing with your wireless interface from the command line.

# ifconfig

To see all your connected interfaces.


# iwconfig

To see interfaces with wireless extensions.


# ifconfig

Should show you the interface is in monitor mode by appending a "mon" to the interface name.

# airmon-ng start wlan0

Start the interface in monitor mode, check the aircrack-ng tutorials for details.


# airodump-ng wlan0mon


Now, there are some issues with the driver that comes from the kernel, not the kernels issue. More likely the manufactures issue. I checked the manufactures drives, but they are sooo bogus and old. Even updates are poor and hard, or nearly close to impossible.

If you wan't a stable driver for using with a virtualbox linux installation, go for the latest one you can fetch from git, here are the latest fixes.

However, I never managed to start this driver in monitor mode. So, if you install this driver, remember to remove the blacklist file in /etc/modules.d/blacklist-native-rtl8192.conf to insert the native driver, if your fix update dosen't work.

I've had some issues with airmon-ng not releasing the wlan0mon interface after it's gone to monitor mode. Sometimes I can get it back after:

# airmon-ng stop wlan0mon
# service network-manager restart

But sometimes it's stuck, and only reboot seems to release it proberly?! Something to investigate, once the TP_LINK_ network above has been checked for penetration with default credentials, and a list of generated passwords...

April 25, 2016

Baking ISOs in OSX

Ever needed a freshly baked ISO to be used with your virtualbox? I needed one, for some playing around stuff. There's a bunch of answers on superuser, but I found that the suggested command using hdiutils didn't allow the image to be bootable in a virtualbox.

$ hdiutil makehybrid -iso -joliet -o Documents/tools/dest.iso /Volumes/source

So, all things equal, dd should be your best bet. Since dd is both fast and efficient. To use dd you'll have to check where your (dv|c)d is mounted.

$ diskutil list
/dev/disk0 (internal, physical):
   #:                       TYPE NAME                    SIZE       IDENTIFIER
   0:      GUID_partition_scheme                        *500.1 GB   disk0
   1:                        EFI EFI                     209.7 MB   disk0s1
   2:          Apple_CoreStorage Macintosh HD            499.2 GB   disk0s2
   3:                 Apple_Boot Recovery HD             650.0 MB   disk0s3
/dev/disk1 (internal, virtual):
   #:                       TYPE NAME                    SIZE       IDENTIFIER
   0:                  Apple_HFS Macintosh HD           +498.9 GB   disk1
                                 Logical Volume on disk0s2
                                 71E61617-FD0B-4FFA-A432-4FE2737C217D
                                 Unlocked Encrypted
/dev/disk2 (disk image):
   #:                       TYPE NAME                    SIZE       IDENTIFIER
   0:                            firefox_cache          +596.7 MB   disk2
/dev/disk4 (internal, physical):
   #:                       TYPE NAME                    SIZE       IDENTIFIER
   0:        CD_partition_scheme                        *861.7 MB   disk4
   1:              CD_ROM_Mode_1 Hacking LiveCD          750.3 MB   disk4s0


Looking at the CD entry, you'll want to create a binary copy of the disk4s0 image since this is the packed iso file. The other disk4 is the mounted and unpacked file system.

Before creating a copy you'll need to unmount the disk, so you can use it.

$ sudo diskutil umount /dev/disk4s0

Next, generate an ISO image with dd:

$ sudo dd if=/dev/disk4s0 of=my.iso bs=2048 conv=sync,notrunc

Sudo is needed to access the 'real' disk iso. Once the disk image has been generated, check if it can boot with virtualbox.

If you wish to create a bootable CD using dd, just reverse the command, by using the iso ad if and the drive as of, check this guide if you're in doubt. Remember to chown and chmod the image if you wish others that root can use it.

April 19, 2016

Reading local mail in Thunderbird

If you are using cron jobs, with crontab, you'll get mail in your local spool mailbox when ever they're done. The way you see this is when you open a terminal, and the:

you have new mail

Appears. Then you stare at it in disbelief, cause you have no clue what, where and how, cause you just emptied your mail from a GUI application.  The mail your terminal is referring to is send internally on your system.

It's known as system mail, there's a nice tread on superuser explaining all this in incredible detail. To read this system mail in Thunderbird create a new mail account. Using your account username like this:

user@localhost

And setting POP3 as the type. Then just select the first option in the dropdown lists. Ensuring that automatic is not selected as the account will then not be created due to tests failing.

Now that you have an account close Thunderbird, and open the file prefs.js in you favorite editor. search for your newly created account, use the user name:

user_pref("mail.server.server7.name", "user@localhost");

You'll find an antry like the above. The server7 part, tells the internal account name for Thunderbird. Your's may be different than mine. Like server2 or some other number. Once you have the server name. Look for the server type entry:

user_pref("mail.server.server7.type", "pop3");

and change pop3 to movemail

user_pref("mail.server.server7.type", "movemail");

restart Firefox and read your local mail. Always remember to back up your shit before editing. Just to be safe. On Linux you may need to change the permissions on the mail spooler:

sudo chmod 01777 /var/spool/mail

April 12, 2016

Running firefox cache on ram disk

There's a trick to make firefox blazing fast by having the cache running on a ramdisk. Here's how its done in Ubuntu, and this is for OSX.

The key difference is the command used to create the RAM disk. For OSX it's the diskutil. You can most likely create the RAM disk usung tge diskutil GUI tool from. But this simple comman dline will create a disk for you:

$ diskutil erasevolume HFS+ '<volume name>' `hdiutil attach -nomount ram://<disk size in bytes`

The ram disk will be mounted in /Volumes/<volume name>

Next, you'll have to use it in firefox. Enter: about:config in the URL and say yes to you'll be careful question. You'll need two keys, a string and an integer key. The string key must point to where your ram disk is located on your drive, and the integer key must contain the ramdisk size in bytes.

Right click the `preference name` table header and select new > string and type: browser.cache.disk.parent_directory and enter the value: /Volumes/firefox_cache
Now, add a new > integer and type: browser.cache.disk.capacity and enter 1165430 as the size, or whatever you like.


If you'd like to keep your ram disk in between boots, you should add the following line to your .bash_profile, to ensure that the ramdisk is created and cache used by firefox after a reboot.

[ ! -d /Volumes/firefox_cache ] && diskutil erasevolume HFS+ '<volume name>' `hdiutil attach -nomount ram://<disk size in bytes`

April 05, 2016

Kali in a Box on OSX

Installing Kali Linux in a virtualBox is a breeze, once you have the ISO file downloaded. All you
have to do is boot kali in virtual box and follow the instructions. When you have the boxed Kali installed, it's time to set up few tweaks to get it running smoothly.

I installed Kali version: 4.3.0. Downloaded as a torrent and apparently this version doesn't have the sources set correctly after installation. The source.list file point to the live distribution and not the online repository. The repository sources should point to:

deb http://http.kali.org/kali kali-rolling main contrib non-free

You can see this issue when the apt-get update command returns faster than a hell. Bump the repository settings in a file called /etc/apt/sources.d/kali.list

echo "deb http://http.kali.org/kali kali-rolling main contrib non-free" > /etc/apt/sources.d/kali.list

Then run the update and upgrade commands

apt-get update && apt-get upgrade

Now, you're ready to install the dkms and linux-headers. So you'll be able go get the Guest Additions Image going. The reason for the dkms package and the headers is that the guest additions compile some drivers, and the compiler needs the kernel headers to look up the correct symbol names.

apt-get install linux-image-4.4.0-kalil-amd64 dkms

Then, reboot and remove the old kernel

apt-get remove linux-image-4.3.0-kalil-amd64

Mount the guest additions image and copy the VBoxGuestLinux.sh file.

cp /media/cdrom/VBoxGuestLinuxAdditions.sh .

Run it and install the image.

./VBoxGuestLinuxAdditions.sh 

I had to run the modprobe command for the vboxsf addition as it failed during the first try. You can see you're succesful when your virtual box reports is going into scale graphics mode.

modprobe vboxsf

Now it's tine to create shared folders. This way you can dump any findings and share them between the host and guest operating systems. If you installed kali is running you can use the shared folder menu, if not issue:

VBoxManage sharedfolder add "kali" --name "stuff" --hostpath "/Users/<your user>/<folder>"

This will assign a shared folder called stuff in your virtual box. From here on you're ready to penetration test your other boxes and your networks, both the wired and wireless. Be glad you installed the linux guest on a mac host. As the other way where you'd be running an OSX guest is rather limited.

Cronnix, crontab & clamscan

Now that you have that clamscan installed, you should create a scheduled scan of your machine. You can do this by adding a crontab job. Crontab is a way to schedule programs to run on various times. Another chrotab job could be a backup, but that's for a different post.

Cronnix, is a GUI for cron, you can install and use this on OSX using ports. IT makes the interface to cron easier to understand for users that don't like to read man pages. If you're ok with man stick to man cron and man cron.

sudo port install cronnix

Select the Cronnix app, and click it.

Next, select new.
Then insert the command you'd like to run: /opt/local/bin/clamscan -r -i -o.  Select simple and select the timing for your cron job.
Press save, and your crontab job should be stored. To verify the schedule you can open a terminal and run:
crontab -l
0    20    *    *    7    /opt/local/bin/clamscan -r -i -o

The above displays the contents of your crontab file. The short version is that every entry in this file divided by a tab character can be read as this: min | hour | day | month | weekday | user | command.

So, the above crontab entry translates to: every sunday @ 20:00 run clamscan. You can get at thorough explanation of cron here. The crontab file is located in /usr/lib/cron/tabs. You can only see the file and contents as super user.

To get a freshclam file you can either create a freshclam entry in crontab or run freshclam as a deamon using:

sudo freshclam -d -c 2 &

The above command executes freshclam as a deamon and checks for a new file twice a day. See man freshclam for detatil.

April 01, 2016

rTorrent

I thought this post should be about Kali-Linux. Because I wanted to install kali in a virtualbox on my MacBook. But it turns out that the rTorrent port cannot build out of the box using the macport-gcc-4.8 compiler. There is a port ticket discussing this issue.

So, instead of installing and configuring Kali, I ended up fixing the compiler issues on the Portfiles for libtorrent and rTorrent locally on my box.

Yes I know I could download Kali using http. But that download takes forever (+ 5hours)! So, fixing and downloading using rTorrent seems to be way faster.

First the Portfiles for libtorrent and rTorrent needs to be updated with the macports-gcc-4.9 compiler, this is done by:

$ echo "config.compiler   macports-gcc-4.9" >> /opt/local/var/macports/sources/rsync.macports.org/release/tarballs/ports/net/libtorrent/Portfile 
$echo "config.compiler   macports-gcc-4.9" >> /opt/local/var/macports/sources/rsync.macports.org/release/tarballs/ports/net/rtorrent/Portfile

The command appends the compiler configuration to thePportfiles. Once, the files are 'patched' the ports can be installed using:

$ sudo port install rtorrent

Rtorrent must be configured, there's tons of information on configuration else where. I simply created a rtorrent session directory, and added my download and session directories to the ~/.rtorrent.rc file.

$ mkdir ~/Downloads/rtorrent_session

Edit (create) the rtorrent.rc file using you favorite editor.

$ emacs ~/.rtorrent.rc

Just add the following content, changing the session and directory entries to the folders you decided to use.

port_range = 26000-26999
directory = ~/Downloads/
session = ~/Downloads/rtorrent_session/
encryption = allow_incoming,try_outgoing,enable_retry


In rTorrent you can add torrents from within the running client. But it is way easier to just throw the torrent file as an argument on the command line, (besides I only needed the one torrent).

$ rtorrent ~/Downloads/kali-linux-2016.1-amd64.torrent 

The downloads starts, and once it finishes simly press ^q (ctrl + q) in the rTorrent window and the program quit. The files you downloaded should be present in the specified download folder. Don't forget to check the sha1sum, to verify you got the corrent file. Jump (cd) into the download directory and execute:

$ shasum -a 1 -c kali-linux-2016.1-amd64.txt.sha1sum kali-linux-2016.1-amd64.iso: OK