February 18, 2013

UnitTest++

Writing unit tests for your C++ code is sometimes painful. But fear no more, with UnitTest++ and it's fixture feature, your shared data between the individual tests becomes so easy to set up it's almost cheating! Sweet!


The code in the tweet is for the svn version of the unittest++ framework, not the one available in google code!!

Just dump the files in your test directory and use them like this:

#include <fstream>
#include <unittest++/UnitTest++.h>
#include <unittest++/TestRunner.h>
#include <test_reporter_junit.h>

using namespace std;
using namespace UnitTest;

int main()
{
    ofstream f("test-report.xml");
    Test_reporter_junit reporter(f);
    TestRunner runner(reporter);
    return runner.RunTestsIf(Test::GetTestList(),NULL,True(),0);
}


November 14, 2012

October 09, 2012

Insight debugger

Insight debugger remember to add the repository key:

#sudo apt-key adv --keyserver=keyserver.ubuntu.com --recv-keys 35DA01C261E46227

September 29, 2012

Nvidia on Linux mint 13

I own a Lenovo thinkpad W520 (well work owns it but I'm using it) it runs Linux mint 13 - mate with the latest generic-pae kernel. At writing (3.2.0-31). At work when my machine is docked I need support for multiple monitors, and for this I need the Nvidia drivers. Here's the recipe that worked for me.

reboot your machine hold the blue ThinkVantage key and go into the bios menu.

  1. Choose the nvidia graphis card. It's called discrete graphics in the display bios display menu item.
  2. Then disable the optimus os detection setting.
  3. save & exit

Once you're booted into the mate desktop and logged in, enable the xorg edgers ppa
There's a recipe in the link. Then, do a

# sudo aptitude install nvidia-current nvidia-setting

I rebooted, and had nvidia graphics for dual monitors, but there's no intel graphics saving when I'm undocked!

I tried a buncha stuff from various blogs and forums, but nothing worked for me except disabling the optimus setting in the bios. The nvidia module was inserted but not activated. There's a number of ways to look at your gfx loading to help you locate the error.

Checking if glx is running:
# glxinfo

Looking at info from the Xserver startup:
# egrep '\((EE|WW|NI)\)' /var/log/Xorg.0.log

Checking that the glx module is loaded:
# egrep -i 'glx|nvidia' /var/log/Xorg.0.log


Check the references for details: Nvidia-304.51 X-swat Changing driver dual gfx cards Xorg-wiki

September 20, 2012

VPN connection from Linuxmint 13

The default Mint 13 installation doesn't include the Cisco AnyConnection compatible client. This means that you'll need to install the network-manager-openconnect plug-in in your network manager.

#sudo aptitude install network-manager-openconnect

Once its done, restart the networkmanager with:

#sudo service network-manager restart

You'll now be able to select open connect from the networkm-anagers vnp menu. If the networkmanager is not shown in the panel you can run it with

#nm-applet &

Then click the network connection icon oon your panel, and select VPN connections > configure VPN

In the network connections window select the +add button, and select Cisco AnyConnect Compatible VPN option.

Fill in your credentials and server name/ip in the edit VPN connection window, and name your connection to what ever you'd like. When you're done save it.

To use your new VPC connection, click the network icon on your panel, and select vpn connections and select your freshly baked connection.

In the connect window, click the hostname/ip address and then click the connection button. Wait .... and fill in your user/passwd when you're asked to.

You'll see a small lock on-top of your network icon once your connection is established.


Rolling debs

Rolling a Debian package from a single control file: equivs
Setting up a local test repository
Hardcore packaging

September 19, 2012

Mozilla using mem as cache

There's two options: browser mem cache vs Ramdisk

Citrix & openmotif on mint13

I need the citrix reciever to look at some work related stuff but the citrix client doesn't work out of the box if you don't have the openmotif library installed, since  Citrix depend on this lib.

sudo aptitude install libopenmotif4

That's all you need. You can get the Citric client here or through aptitude 

Updating ant tools.jar not found

Turns out, the openjdk-6 that comes installed on Linuxmint contains an error that causes ant to bitch bout a missing tools.jar file! Luckily this file is shipped with openjdk-7 ;)


Basically you'll need to installs openjdk-7 and then update the alternatives

sudo aptitude install openjdk-7
sudo update-alternatives --config java

select openjk-7 option and then remove the old java stuff

sudo aptitude remove openjdk-6


Refs:
https://help.ubuntu.com/community/Java
http://ubuntuforums.org/showthread.php?t=1977619

September 12, 2012

Send tab url

Did you ever try to browse for work related stuff on your on machine? I did and often did I copy each tab into my gmail account to send em to work.

But now I installed the send tab url add on to firefox and voila .... One click and all my tabs got work ;)

There's a bunca stuff to help your productivity with firefox on mint! like: Installing firefox, Ridding the mint search & 10 extentions.


August 30, 2012

Using UML for documentation? Here's a small and great quick guide

April 03, 2012

Instruments

http://www.earslap.com/projectslab/otomata

March 30, 2012

Creating a live distribution from your installation

There where my 3 references, they are there because I needed to create a new kernel for the Asus machine, It uses the inttel GMA500 chipset and therefore it must have build in KMS to get the correct framebuffer set.

I still build my kernels using the oldschool method!

Custom distro from your installation. Remember to remove all th eimages and crap you don't want to distribute.

Once you have your live distribution, you can use this strategy to update it.

March 02, 2012

Using Adobe Air on new linux distributions?

Whoa, if you really wanna feel the suck, this is where you need to go. There's no longer support for Air on Linux (or android) from adobe :(

So, if you're stuck with a bunca flashaholics, blinded by the virtual machine. A boss that insists this is the technology (Since it's blameable), be sure to wget the contents before the documentation disappear as well.

On Debian based systems: sudo aptitude install adobeair does the installation trick! At least for now. If not, here's an adobeair 2.6 package for your needs.


Rreferences:
help.adobe
air.administrators.guide

February 29, 2012

asciidoc

Today, I finally realized it's so much better to write documentation using asciidoc

asciidoc cheat sheet
Adding filters

We're using the program to traverse a build and collect readme files that then serves as different sections of a document. This has the documentation as close to source code as possible. That is a clear advantage. Also we can run scripts from inside the documents that ensure the latest version of the documentation is used.

Asciidoc ROCKs!!!! In a way Metallica can't even imagine!!!

February 17, 2012

Linux mint 12 configuration

There's a bloat of new stuff in Mint 12, mostly related to gnome 3 update ;) This helped me getting through the update.

Tips and tricks


Loads of stuff:


Only thing I didn't respolve yet is my iPhone :(

November 23, 2011

placing your local source under svn

http://maverick.inria.fr/~Xavier.Decoret/resources/svn/index.html

October 16, 2011

ftpfs to your website!?!

I always hated updating my website ;( Don't like the Hosting's website tool as it only works on the platform I don't use. And ftp'ing is just not 2100 century. Then I stumbeled on curlftpfs, it's old but good news.


#sudo apt-get install curlftpfs
#sudo nano /etc/fuse.conf

uncomment user_allow_other

#mkdir mountpoint
#curlftpfs -o allow_other ftp://user:pass@ftp.somewhere.org mountpoint/

Now you can do normal file commands in the mountpoint, Like editing in emacs and storing the files directly.

July 06, 2011

find command revisited

Finding empty directories and deleting them:
# find /path -depth -type d -empty -exec rm -r {} \;

Finding all gcc coverage files and removing them
find . -name '*gcno' -o -name '*.gcda' -exec rm -f {} \;

Great find command page.

Configuring Ubuntu 11.04 to run with the highest VGA resolution on i915

After the i915 configuration my screens did not use the 1920x1080 resolution that my monitor is capable of. Neither did it select VGA1 as input :(

# xrandr
reports LVDS1 at 1280x1024 as default display, editing my xorg.conf didn't seem ti fix the issue? Guess I edited it wrong!

There's two tweaks that need to be created, firstly I disabled LVDS1 and forced VGA1 as the default video device at boot Append:
video=LVDS-1:d video=VGA-1:e
to your kernel boot parameters in /etc/default/grub


Mine looks like this now:
GRUB_CMDLINE_LINUX_DEFAULT="quiet splash video=LVDS-1:d video=VGA-1:e acpi=force elevator=noop i8042.noloop=1 usbhid.quirks=0xeef:0x1:0x40"

Next, force gdm to use the resolution at login, by adding:

xrandr --output VGA1 --mode1920x1080 --rate 60

to  /etc/gdm/Init/Default

The xrandr command does ofcource depend on your monitor and graphics device. You cn alwasy type xrandr to see it's capabilities. See man xrandr for details.

July 04, 2011

Configuring Ubuntu 11.04 with kernel 2.6.38 for intel 945 & egalax Touch screen

Got a small customized PC at work that needs to have both the eGalax touch screen and the intel i915 (i945GM) driver enabled. From out of the box the screen is booting with the vesa driver, quirkint it to use the intle driver just gave a plain blank screen. The eGalax touchpad didn't send any signals so that was a pretty sucky start.

There's a lot of discussion about what's wrong etc, how to configure both the kernel and the system. I googled the web for answers and there was a lot of noise, in all this noice i found the following posts quite helpfull. They're good backgound information if your're interested.

Bug report - Kernel Mode Setting - debian - Kernel Mode Setting - ubuntu - Xorg-edgers - Intel drivers - i915 Kernel configuration database

This is how I configured the box to work with both.

Fetching the Xorg-Edgers PPA:
You need to get the Xorg-edgers added to your ubuntu package list, the link has instrunctions on how to set up this ppa.

Then you'll have to update your system

#sudo apt-get update
#sudo apt-get upgrade

Should do the trick, you can add the xserver-xorg packages needed by hand if there'ssomething missing.

Configuring the kernel:

The eGalax touch screen is build into the kernel this is se by selecting: CONFIG_HID_EGALAX=y

The i915 driver is a bit more tricky, as there are some things that, apparently, depend on acpi. There are some things like kms, which for never kernels (2.6.36 i believe??) automatically enable kms for the intle, radeon and ati gfx cards.

I tried a number of different approaches, using the trial and error method, before i found a reasnoable configuration. As for the graphics configuration you'll have to add the following flags:

CONFIG_ACPI_VIDEO=y
CONFIG_VIDEO_CAPTURE_DRIVERS=y
CONFIG_VIDEO_HELPER_CHIPS_AUTO=y
CONFIG_VIDEO_SAA7134_RC=y
CONFIG_USB_VIDEO_CLASS_INPUT_EVDEV=y
CONFIG_VIDEO_CX231XX_RC=y
CONFIG_VGA_ARB=y
CONFIG_VGA_ARB_MAX_GPUS=16
CONFIG_VGASTATE=y
CONFIG_VIDEO_OUTPUT_CONTROL=y
CONFIG_FB=y
CONFIG_FB_BOOT_VESA_SUPPORT=y
CONFIG_FB_CFB_FILLRECT=y
CONFIG_FB_CFB_COPYAREA=y
CONFIG_FB_CFB_IMAGEBLIT=y
CONFIG_FB_MODE_HELPERS=y
CONFIG_FB_TILEBLITTING=y
CONFIG_VGA_CONSOLE=y
CONFIG_FRAMEBUFFER_CONSOLE=y
CONFIG_FRAMEBUFFER_CONSOLE_DETECT_PRIMARY=y
CONFIG_FRAMEBUFFER_CONSOLE_ROTATION=y
CONFIG_LOGO_LINUX_VGA16=y
CONFIG_DRM=y


For some reason, i don't know why, the i915 is not selected but the menuconfig or makeoldconfig option will generate new configuration for the experimental intel drivers that over look the i915 stuff.  So you'll have to append the .config file with these three options to get the correct intel driver build into the kernel.

CONFIG_DRM_KMS_HELPER=y
CONFIG_DRM_I915=y
CONFIG_DRM_I915_KMS=y


I removed CONFIG_FB_VESA and CONFIG_FB_VGA16 to avoid issues with conflicting framebuffers in Xorg. See  Kernel Mode Setting - debian for details. You can check all the dependency flags from CONFIG_DRM_I915 in the kernel configuration database if you're interested.

Building the kernel &amp; installing the kernel:
kernel building help


#sudo fakeroot make-kpkg --append-to-version= kernel_image
#sudo dpkd -i ../linux-image..deb

Configurating the boot options:

Once kernel is ready you'll have to setup the system, to use it correctly. You'll have to add the i915 kms selection option to /etc/modprobe.d simply add a file called i915-kms.conf containing:

options i915 modeset=1

Then edit the grub configuration to get both eGalax and i915 to work, if you have other options to the GRUB_CMDLINE_LINUX_DEFAULT flag append these:

GRUB_CMDLINE_LINUX_DEFAULT="quiet splash acpi=force elevator=noop i8042.noloop=1 usbhid.quirks=0xeef:0x1:0x40"

i915 kms depend on acpi, that why it is forced. The elavator=noop and i8042.noloop=1 and usnhid.quirks=0xeef:0x1:0x40 are all options for the eGalax touch screen. The quiet and splash are options to get a linux splash logo at boot and quiet boot.

dont forget to update grup with these new settings

#sudo update-grub

Adding policy file for the eGalax touch screen:

I added an evtouch.fdi file to the hal layer, this file contains thesetup for the touch screen. It is placed in:
/etc/hal/fdi/policy/evtouch.fdi

And it's contents are: evtouch.fdi
<?xml version="1.0" encoding="UTF-8" ?>
<deviceinfo version="0.2">
<device>
<match key="info.product" contains="eGalax Inc. USB TouchController">
<merge key="input.x11_driver" type="string">evtouch</merge>
<merge key="input.x11_options.ReportingMode" type="string">Raw</merge>
<merge key="input.x11_options.Emulate3Buttons" type="string">false</merge>
<merge key="input.x11_options.Emulate3Timeout" type="string">1</merge>
<merge key="input.x11_options.SendCoreEvents" type="string">On</merge>
<merge key="input.x11_options.MinX" type="string">0</merge>
<merge key="input.x11_options.MinY" type="string">2</merge>
<merge key="input.x11_options.MaxX" type="string">4096</merge>
<merge key="input.x11_options.MaxY" type="string">4096</merge>
</match>
</device>


Configuring Xorg:
Finally you'll need to modify the Xorg.conf file. As ubuntu doesent have one pr default you'll have to generate it.Go to a non graphical login and use Xorg to generate the config file.

#sudo service gdm stop
#sudo Xorg -configure

will create a xorg.conf.new file in your current directory. it may be a good idea to wait with the file generation until you have booted your system with the new kernel. There may be a risk that the generation will fail because Xorg cant load the i915 driver.

Once you have the configuration ready you'll need to copy it to the /etc/X11/ directory and name it xorg.conf

#sudo cp xorg.conf.new /etc/X11/xorg.conf
#sudo service gdm start

Calibrating the touch screen:
Then you should calibrate the eGalax touch pad, you can install the touchscreen calibration application with apt-get. There's a lot of very good information here.

#sudo apt-get install xinput_calibrator

You'll get a menu item in System | Administration | calibrate touch screen
Simply run it and follow the instructions.

I copied my calibration to a file called: 99-calibration.conf it contains:

Section "InputClass"
        Identifier      "calibration"
        MatchProduct    "eGalax Inc. USB TouchController"
        Option  "Calibration"   "192 3874 476 3636"
        Option  "SwapAxes"      "1"
EndSection

You may not need the SwapAxes flag, but mine where defenately swapped. I still cant the get the compiz_check script to run on my machine but Unity and the compiz window manager are both running with a resolution of 1280x1024.

My configuration files are available here: xorg.conf 99-calibration.conf i915-kms.conf grub evtouch.fdi

December 16, 2010

Running iTunes on LinuxMint

Check your wine setup:

#dpkg -l | grep wine | awk '{ print $2, " ",$3}'
 
wine   1.0.1-0ubuntu8
wine1.2   1.1.31-0ubuntu3
wine1.2-gecko   1.0.0-0ubuntu3

Install wine 1.2 and the iTunes version 10 (i took the latest from the iTunes.com) website. This worked out of the box. I still have to test iPhone connection.

The iPhone connection can be setup doing this. Using http://www.libimobiledevice.org/

October 20, 2010

Linux command line stuff

Finding number of files in a folder:
find . -type f | wc -l

Finding number of subfolders in a folder:
find . -type d | wc -l


All taken from here

Creating 1 pdf from multiple images:

cd FOLDER_WITH_IMAGES
FILES=$(ls *jpg)
mkdir temp && cd temp
for file in $FILES; do BASE=$(echo $file | sed 's/.jpg//g'); convert ../$BASE.jpg $BASE.pdf; done &&
pdftk *pdf cat output ../FINAL_NAME.pdf &&
cd ..
rm -rf temp

All taken from here

July 28, 2010

Active state perl under cygwin

Follow the script description here, But instead of removing the perl from the cygwin installation and adding stuff to the path :) Simply replace the cygwin perl.exe file with the script.


Perl and the windows registry links:
http://cpansearch.perl.org/src/INGY/Kwiki-0.39/lib/Kwiki/Registry.pm
http://www.xav.com/perl/site/lib/Win32/TieRegistry.html

March 04, 2010

LinuxMint 8 running in Virtualbox

At work I have a WineDoh$ machine :( So not to miss my trusty Mint machine during the day I decided to install it in virtualBox.

The tricky part is to get the network running for the guest machine (the LinuxMint), as you need to create a bridge between the host and the guest. Then you need to set the proxy on your LinuxMint guest machine.


Now you should be able to run: 

sudo apt-get update
sudo apt-get upgrade

And get the latest package updates, as well as intall your favorite applications. To share data between the two machines, open the host machines shared folder menu:


Create a shared drive
Then on the guest you need to mount this drive:

sudo mkdir /mnt/windows_drive
sudo mount.vboxfs D_DRIVE /mnt/windows_drive
ls /mnt/windows_drive

and you should be able to see your files.

 [Edit 1] Update on the proxy configuration

March 01, 2010

PS3 media server on LinuxMint

Setting up a ps3 media server was extremely easy! just follow the guide at: http://ps3mediaserver.org/forum/viewtopic.php?f=3&t=5589Tests

I previously attempted streaming to my ps3 using vlc but the result was not good. The video was stopping. It seemed like a transcoding problem.

However, installing vlc and using this through the ps3media server has an exellent result.

C++ enum inheritance

Today I needed to have enums with an inheritance ability. I have some HMI panels in an application where each panel button has a handler function, which is placed incide a stl vector. Each of these buttons can be enabled and disabled using a unique ID, it's number in the vector.

The problem I fased was that the base class implementing the basic functionality of the panels (done and cancel) also implemented the indecies for these functions. Now in a derived class i wanted to extend the enum with button indecies for the buttons added by the new class, but enums and C++ does not support this directly.

To overcome the problem a template can be used. here is a similar approach using atemplate to extend enum definitions. This solved my problems and I can get the panels back in action.

February 18, 2010

Asus eeepc 1101H & Linux

Woooa, and I thought my biggest problem was some F****r stealing my powerbook!! But no, I wasn't even close!

So in the lack of Mac i decided to get one of those nice looking eeePC seashells. In fact I was so "blinded by the light" that I completely forgot to look at the hardware compatibility.

So, I ended up buying a Asus eeePC 1101H, which I regretted until today! Since this machine includes the *famous* gma500 Intel (aka poulsbo) graphics chip :O

Ubuntu, 9.04  (EasyPeasy 1.5) and 9.10  all have vesa (read:slow graphics) Now what?? I waited! and waited and waited .... from October 2009 to Feburary 2010, when finally the poulsbo drivers have a decent installation script!!

Now I'm the lucky owner of a Asus eeePC running Ubuntu 9.10.

To get your own simply follow the instructions here, and here.

In short the procedure is:

0. Create ubuntu libe stick and Install ubuntu from live usb stick
2. Reboot
3. sudo apt-get update
4. sudo apt-get upgrade
5. reboot
6. wget http://dl.dropbox.com/u/1338581/Gma500/scripts/poulsbo.sh && sh ./poulsbo.sh
7. reboot
8. sudo apt-get install ndisgtk (may not be needed)
9. restart network (or reboot)
10. edit /etc/resolv.conf and /etc/dhcp3/dhcp.conf with settings from open dns (208.67.222.222, 208.67.220.220)
11. Open Firefox and put about:config in address bar and hit enter.
In filter type network.dns.disableIPv6 and hit enter:
double click on line and it will change to:
network.dns.disableIPv6;true
12. Disable the ipv6 kernel module
13. Install the wicd wireless handler


You should now have a running Ubuntu distro great with network and graphics!

Previous distro attempts:
Slackware13 from stick - booted after installation but, darn this distro could not see my hard disk, due to a missing scsi module in the kernel

Xandros from stick (I figured: hey this is an Asus distro so i most likely will install smoothly) No, not even close, during usb install it barfed all over me with "can't find installation media" There's no optical drive on the 1101!!

Debian (I already have a machine running this) - No network! no driver! and really slow graphics :(

ArchLinux. See debian.

I considering dumping MintLinux8 on a second partition just to test the installation again.

May 26, 2009

Designing devices with time

Currently there are many embedded devices that needs some sort of time settings. This is a brief description of what to remember when designing systems that depend on time.

Firstly, the device time chip should be checked for backup and recovery. Figure out how to use this for backing up the time!! This is important as the time becomes an issue when synchronizing data between devices like the embedded one and the PC.

Consider the following:
1. Initial time in the device, how is the time written to the time chip the first time? How can the device know the difference between first "real" boot and all other boot's.

2. How is the time synchronized between the systems?? What format is used for communication?? How is data marked as valid or invalid. Transmitted or not transmitted.

3. Is the implementation on both sides using the same interpretation of the "time.h" standard (if this is the chosen time format) and can they both handle the summer time setting?

October 09, 2008

Slackware 12 on the IBM x61s

Here is the description of how I got slackware 12 running on a lenovo x61s with
all the things I need.

Installation:
Scrinking the vista image
Dualboot installation (if you really need it ;)
Thinkpad kernel

System configuration:
Bluetooth
Wireless
Dual monitor setup
Acpi
vpn
Modified system configuration files

User applications:
Netbeans & Ant
Kdesvn, rapid svn
Openoffice
Diffing files
Cobertura

Installation:
Scrinking the vista image:
First off you'll have to scrink your vista image since the machine
comes with vista preinstalled. You can use the vista diskmanagement
tool for this (this is what I did).

I managed to get approx 32 GB from the vista installation, which is
more than enough for slackware.

Dualboot installation:
There's a problem with the intel boot loader, this problem means that
you can't install lilo in the mbr or on th efirst partition of the hd
becaue of the recovery partition.

So I deleted the recovery partition, it is the first partition
(/dev/sda1) of 5.4 GB. Then I created a linux partition instead and
installed grub on this. I didn't use lilo since it was never able to
go to the mbr???
Disk /dev/sda: 120.0 GB, 120034123776 bytes
255 heads, 63 sectors/track, 14593 cylinders
Units = cylinders of 16065 * 512 = 8225280 bytes

   Device Boot      Start         End      Blocks   Id  System
/dev/sda1               1         679     5448704   83  Linux
Partition 1 does not end on cylinder boundary.
/dev/sda2   *         679       10487    78781440    7  HPFS/NTFS
Partition 2 does not end on cylinder boundary.
/dev/sda3           10487       10518      254667   82  Linux swap
/dev/sda4   *       10519       14593    32732437+  83  Linux


That's my setup, planning to mount /dev/sda1 as /var clean the vista
partition and mount this as a windows path setup! But that's still to
come.

With the partitions ready get a hold of a CD drive and throw slackware
on the hdu. I selected everything ;) That's what slackbook reccomends.

Thinkpad kernel:
Version 2.6.23_rc5
Depending on your laptop type, mine's a x61s that at writing is a
retalively new machine, you should build a kernel. This is to ensure
that you get all the acpi features of you machine.

There's a bunch of patches you need, they are all listed on the
slackwiki.org. I just took a 2.6.23-rc9 this had everything except
suspend to ram. I'll apply the suspend patch once I have the
time. Since it seems like there's a lot of issues with recovering from
suspend to ram.

Follow the instructions on slackwiki for building your kernel and you
should be running in no time. While you're at it you should add fuse
(file system in user space) and smbfs support.

This'll be a great help since you can then use sshfs or obexfs to mount a ssh
login as a drive, mount a obex enabled phone as a drive and finally mount the
windows shared drives.

Add the following entry to /boot/grub/menu.lst
  title thinkpad on (/dev/sda4)
  root (hd0,3)
  kernel /boot/vmlinuz-huge-smp-2.6.23-rc9-smp root=/dev/sda4 ro vga=normal

To install your new kernel in the grub boot menu

Version 2.6.25.8:
Yes you should upgrade your kernel once in a while ;) There's a couple of new
ACPI configurations, and I also added the MPPE encryption in device drivers
to get vpn running. This is needed. It should be a module but because of
issues with the pptpsetup command I made a kernel with the encryption built
in. pptpsetup kept saying that the pppd_mppe_mppc module was not installed.

Copy the old configuration file for you latest running kernel
cp /oldkernelpath/.config /newkernelpath/

Then issue:
make oldconfig

Command to setup the new kernel with your latest changes. After this you can
run a:
make menuconfig

To add the new stuff you need. Once done
make
make modules_install

and I always manually copy the boot image to the /boot partition along with
any configuration for this particular kernel. See the 2.6.23_rc5 on how to
update grub.

System configuration:
Bluetooth:
Unfurtunately there's no bluetooth on/off switch, and this chip is
using a lot of power. but you can (enable|disable) the interface as
root via /proc/acpi/ibm/bluetooth.
 
echo disable > /proc/acpi/ibm/bluetooth
echo enable > /proc/acpi/ibm/bluetooth

switches bluetooth off and on respectively. When using bluetooth for
you everyday tasks, like uploading midlets to the phone or using dial
up in the train to and from work there's still a couple of things to
do.

I installed kdebletooth and kmobiletools. These tools integrate the
bluetooth interface directly in kqonquerer. The versions avaiiable as
beta3 never worked on my machine?? Dunno why, but I simply used the
versions from slax (www.slax.org). Convert the *.mo packages to
slackware tgz and install these as you'd install any other slack package.
You'll need linux live tools or a live distribution to do this. If you
havent all ready installed slax on your usb stick now's a good time to
do so. (see www.slax.org)

Once you have the mobile tools installed you'll have to ensure that
all users can run with bluetooth. Add:
hcid        # set the machine ID
hciconfig   # configure the bt subsystem
sdpd        # Let other BT devices see the machine

to our /etc/rc.d/rc.local or your distribution equivalent. On slack
there's a little trick copied from debian to set up the pin and phone
names.

In the file /etc/bluetooth/hcid.conf you'll can set the name of your machine
# Default settings for HCI devices
device {
    # Local device name
    #   %d - device id
    #   %h - host name
    name "darkstar (%d)";

Mines darkstar, the default name is Bluez. Setup the pin by echoing
the pin number you like to /etc/bluetooth/passkeys/default. I.e.
echo 1234 > /etc/bluetooth/passkeys/default

Now you can pair you phone. If you have issues chack the thinkpadwiki
for bluetooth details.

If you like you can autobind you bluetooth device using the
rfcomm.conf file. This is straight forward just place you phone's
bluetooth address with the one in the file, and voila you have a
rfcomm device you can use.

Heres my rfcomm.conf file:
cat /etc/bluetooth/rfcomm
rfcomm0 {
    # Automatically bind the device at startup
    #bind no;
    bind yes;

    # Bluetooth address of the device
    device 00:18:C5:3D:BF:C1; #Noia N73

    # RFCOMM channel for the connection
    channel    2; #Dial up networking port DUN profile connection

    # Description of the connection
    comment "Noia N73";
}

This is the best availabel guide to get BT dial up running:
http://www.marotori.com/blog/?p=16. You'll need a phone that supports the
bluetooth DUN profile. Believe me it's harder to get tha you think. I'm
currently using an Nokia N73. Runs perfectly with 3G

Heres my Slack dial up configuration:
first the chat-gprs file to set up th ebt moden for using the fastes
connection (gprs and 3G)
cat /etc/ppp/chat-gprs
'' ATZ OK
AT+CGDCONT=1,"IP","internet"
OK "ATD*99***1#"
CONNECT ''

Next my mobile internet provider is Danish TDC:
cat /etc/ppp/peers/tdc
/dev/rfcomm0 115200
connect '/usr/sbin/chat -v -f /etc/ppp/chat-gprs'
crtscts
modem -detach
noccp
defaultroute
usepeerdns
noauth
ipcp-accept-remote
ipcp-accept-local
noipdefault
debug
lcp-echo-failure 0

With these two files on place simply start the pppd as root, by issuing:
pppd call tdc

If you run into problems adding a debug on the pppd command will most likely
help
pppd call tdc debug

or you could use this small script
#!/bin/sh
sudo pppd call tdc debug

Wireless:
Is incredably straight forward. All you have todo is to insert the
inteldriver and then build the wrapper for it. The instructions to do so is
right here:
http://slackwiki.org/ThinkPad_X61s#Wireless_LAN_.28802.11.29

Next you'll need to get the wireless net running. You'll have to start the
service and the driver so it is loaded when you activate the machine.

Then you'll have to activate the card. This is done by starting the interface
with:
ifconfig wlan0 up
iwconfig wlan0 ESSID "your net work name"
dhcpcd wlan0

First you start the interface, then you attach it to your preffered network,
and finally you get an IP address from the networks dhcp server.

I added the following to my rc.local:
if [ -z ifconfig eth0 | grep ]; then
   if [ -s ifconfig wlan0 | grep ]; then
      iwconfig wlan0 ESSID "network name"
      dhcpcd wlan0
   else
      echo "wlan0 could not be found, check the wireless switch"
   fi
fi

Now you'll have to chmod the script to be able to execute it! And notice
you'll have to be either root or a sudo'er to activate the ifconfig and iw
config calls.
cat /root/wireless_nome.sh
#!/bin/sh

if [ -e /etc/dhcpc/dhcpcd-wlan0.pid ]; then
    rm /etc/dhcpc/dhcpcd-wlan0.pid
fi

ETH0=$(ifconfig|grep eth0|cut -c 1-4)
WLAN0=$(ifconfig|grep wlan0|cut -c 1-4)

if [ -z $ETH0 ];then
    if [ -z $WLAN0  ];then
        echo "No wireless adaptor found, check the wireless switch!"
    else
        iwconfig wlan0 ESSID "your wireless ssid"
        dhcpcd wlan0
        exit 0;
    fi
else
    echo "apparently there's a ethernet card!"
fi
exit 1;

Dual monitor setup:
Adding the following to your .xprofile file will utilize the screen you have
on your desk.
if [ -z xrandr|grep VGA ]; then
   xrandr --output LVDS --mode 1024x768  
else
   xrandr --output LVDS --mode 1600x1200  
fi

My xorg.conf file can be found here:
cat /etc/X11/xorg.conf
# John's handhacked dual monitor xorg.conf file
Section "ServerLayout"
    Identifier     "X.org Configured"
    Screen      0  "int" 0 0
    InputDevice    "Mouse0" "CorePointer"
    InputDevice    "Keyboard0" "CoreKeyboard"
EndSection

Section "Files"
    RgbPath      "/usr/share/X11/rgb"
    ModulePath   "/usr/lib/xorg/modules"
    FontPath     "/usr/share/fonts/TTF"
    FontPath     "/usr/share/fonts/OTF"
    FontPath     "/usr/share/fonts/Type1"
    FontPath     "/usr/share/fonts/misc"
    FontPath     "/usr/share/fonts/75dpi/:unscaled"
EndSection

Section "Module"
    Load  "xtrap"
    Load  "GLcore"
    Load  "dri"
    Load  "dbe"
    Load  "glx"
    Load  "extmod"
    Load  "record"
    Load  "freetype"
    Load  "type1"
EndSection

Section "InputDevice"
    Identifier  "Keyboard0"
    Driver      "kbd"
    Option        "XkbModel" "pc104"
    Option        "XkbLayout" "dk"
    Option        "XkbOptions" "grp:shifts_toggle"
EndSection

Section "InputDevice"
    Identifier  "Mouse0"
    Driver      "mouse"
    Option        "Protocol" "auto"
    Option        "Device" "/dev/input/mice"
    Option        "ZAxisMapping" "4 5 6 7"
EndSection

Section "Device"
    Identifier  "Card0"
    Driver      "intel"
    VendorName  "Intel Corporation"
    BoardName   "Mobile Integrated Graphics Controller"
    Option        "MergedFB" "true"
    Option        "MetaModes" "1024x768 1024x768"
    Option        "MergedDPI" "100 100"
    BusID       "PCI:0:2:0"
EndSection

Section "Device"
    Identifier    "Card1"
    Driver        "intel"
    BusID        "PCI:0:2:0"
    Screen        1
EndSection

Section "Screen"
    Identifier "int"
    Device     "Card0"
    Monitor    "laptop"
    DefaultDepth     24
    SubSection "Display"
        Viewport   0 0
        Depth     1
#        Virtual   3000 1600
    EndSubSection
    SubSection "Display"
        Viewport   0 0
        Depth     4
#        Virtual   3000 1600
    EndSubSection
    SubSection "Display"
        Viewport   0 0
        Depth     8
#        Virtual   3000 1600
    EndSubSection
    SubSection "Display"
        Viewport   0 0
        Depth     15
#        Virtual   3000 1600
    EndSubSection
    SubSection "Display"
        Viewport   0 0
        Depth     16
#        Virtual   3000 1600
    EndSubSection
    SubSection "Display"
        Viewport   0 0
        Depth     24
        Virtual   2624 2048
    EndSubSection
EndSection

Section "Monitor"
    Identifier   "laptop"
    VendorName   "LEN"
    ModelName    "4000"
    Option        "DPMS"
EndSection

Section "Screen"
    Identifier "ext"
    Device     "Card1"
    Monitor    "external"
    DefaultDepth     24
    SubSection "Display"
        Depth     24
        Modes    "1600x1200" "1280x1024"
    EndSubSection
EndSection

Section "Monitor"
    Identifier  "external"
    Option        "DPMS"
EndSection

Section "DRI"
    Mode         0666
EndSection

Acpi:
Getting the full potential of the laptop means using acpi! In the kernel part
of this document you have putin acpi support and the thinkpad dirvers for
acpi. The next part is to configure it. There is a big indepth guide tpo acpi
here: http://slackwiki.org/ThinkPad_X61s#ACPI

The generel idea is that you place small scripts in /etc/acpi/actions, then
you point to these scripts from /etc/acpi/events/

The lid event can be controlled like this:
event=button lid.*
action=/etc/acpi/actions/sleep.sh

Then dump the sleep script in /etc/acpi/actions. But you should notice that
there is aproblem with sleeping. The wake up part screws up the screen
light/brightness leaving the screen almost black. I have attempted to fic
this issue but no luck so far.

vpn:
Creating a vpn connection is quite tricky on slackware! Since all the common
and preffered wizards fails! Which leads to actually reading the
documentation and figuring out what actually happens ;) (I love Slackware)

So, read the pptpclient documentation for hand configuration:
http://pptpclient.sourceforge.net/howto-debian.phtml#configure_by_hand
and routing: http://pptpclient.sourceforge.net/routing.phtml#client-to-server

I created the options file as ressomended but added the refuce-eap option
as well, as the pptpserver om mpt1.dk kept kickin my machine off. Here are
the answers to the handconfiguration:
1.
    * the IP address or host name of the server ($SERVER) mpt1.dk
    * the name you wish to use to refer to the tunnel ($TUNNEL) mobile
    * the authentication domain name ($DOMAIN) MPOFFICE1 (not needed)
    * the username you are to use ($USERNAME) jd
    * the password you are to use ($PASSWORD) youwish!
    * whether encryption is required. But of course (mppe128)

2. cat /etc/ppp/options.pptp
lock noauth nodeflate nobsdcomp refuse-eap

3. cat /etc/ppp/chap-secrets
jd      PPTP    youwish!    *

4. cat /etc/ppp/peers/mobile
pty "pptp mpt1.dk --nolaunchpppd"
name jd
remotename PPTP
require-mppe-128
file /etc/ppp/options.pptp
ipparam mobile

The only problem with the handconfiguration is that it comes from debian, and
slackware does not contain the pon and poff commands. SÃ¥ all you have to do
is to fire this little expression to start the vpn connection:
 
pppd pty 'pptp mpt1.dk --nolaunchpppd' call mobile debug dump logfd 2 nodetach

Where the mpt1.dk is replaced with your server name and the mobile is
replaced with tour tunnel name.

Next you'll need a route to the vpn network, this can be obtained with the
command
 
route add -net 192.168.1.0 netmask 255.255.255.0 dev ppp0

where the ip is the net you'll connect to and ppp0 is the interface you wich
to connect the route to! I have created a small script:
cat /etc/ppp/ip-up
#!/bin/sh
/sbin/route add -net 192.168.1.0 netmask 255.255.255.0 dev ppp

which adds the route to the network i need, there are several things to add
to this script to get the connections work automatically

The next thing was host resolving. The nameservice provided did not work over
the vpn tunnel :( But *nix systems have the /etc/hosts file. Here I added an
entry the hosts I need.
cat /etc/hosts
# For loopbacking.
127.0.0.1        localhost
127.0.0.1        darkstar.domain.com darkstar

#system specific hosts
svn.server.ip.address   svn_repo

That concludes the vpn configuration.

Modified system configuration files:
su -
find /etc/ -name '*~'
/etc/sudoers~
/etc/X11/xorg.conf~
/etc/bluetooth/rfcomm.conf~
/etc/bluetooth/hcid.conf~
/etc/fstab~
/etc/rc.d/rc.local~
/etc/rc.d/rc.bluetooth~
/boot/grub/menu.lst

User applications:
Netbeans & Ant:
I did a slackware package containing this. Its easy since it's located
in /opt. considering doing the same with openoffice. But hey it's a
bunch of small tgz's now so why bother ;)

You'll have to create a small script to be able to send the
environment variables to netbeans (if you'd like to activate this from
any menu item in your desktop)
#!/bin/sh
export EMC=/home/$USER/work/emc ;
export WORK=/home/$USER/work/ ;
netbeans --jdkhome /usr/lib/jdk1.6.0_01/ ;

Save this as netbeans.sh and make it executable with chmod u+x Put it
in you favorite desktop menu item and you are up running. Or you can simply
add the netbeans program to the panel as an application

I also added the work specific env vars to my .bashrc enabling me to
run netbeans from any terminal and set up ant.
#setup work environment for EMC client project
export EMC=/home/$USER/work/emc ;
export WORK=/home/$USER/work/;

#setup ant
export ANT_HOME=/usr/local/apache-ant-1.7.1
export JAVA_HOME=/usr/lib/jdk1.6.0_01
export PATH=${PATH}:${ANT_HOME}/bin:${JAVA_HOME}/bin

To install ant just copy the ant bin and lib folders to the place in
the system you prefer. Mine's /usr/local/ant/ insluding bin and lib

If you want to build ant it is a different story. Then you'll have to obtain
the sources from http://ant.apache.org/. Follow the instructions on
http://ant.apache.org/manual/index.html to somplete the installation.

I neede to place the junit for building the test cases for ant. This optional
package must go in ants optional directory:
cd $ANT_HOME
mkdir lib/optional/
cp junit.jar junit.jar

This gives you the junit file available for ant. Then just build normally,
and install the ant. My ant directory at writing is: /usr/local/apache-ant-1.7.1/

If you need the possibility of using the Sony ericsson emulator with netbeans
read the entry.

Kdesvn:
To get svn running with a wysiwyg thing you'll need something like
kdesvn. just fetch and install the package. It is done by following the
package instructions.

Openoffice:
Since openoffice installer is using rpm, which suck, and wont work
directly on slackware you'll have to rpm2tgz all the oo rpms. Do:
mkdir tgz
cd tgz
rpm2tgz ../rpms/*.rpm
installpkg *.tgz

now all you have todo is to create the menu items and the links to
/usr/bin if you prefer.

Diffing files:
You'll need meld. Its the best available diff and merge tool. Yess it beats
ediff! On a slack 12 kde machine you'll have to get the gnome-pythn
package. The best way (once you have slapt-get installed) is:
 
slapt-get --install gnome-python

That takes care of the meld dependencies. Now you'll need meld. It's
available here: http://meld.sourceforge.net/ there even is a slackware
package :) Down the meld slackpack and fire:
 
installpkg meld.whatever.version.you.downloaded.tgz

Next issue:
 
meld

To start melding the files ;)

October 07, 2008

iSync and Nokia N81

For years I have been wondering why Nokia didn't support my precious Powerbook. But I just found out (guess it's old news already) that it's possible to sync my N81 phone and the applications I use on the Mac.

phoneboy.com and Nokia both explain how to do this with the supported phones.

But there seem to be a catch with N81. Nokia have addressed this issue by launcing a installer package. This pakage is available by entering N81 in the search field at the Nokia iSync support page.

Once the plugin has been installed there are still some tweaks to do. This is because (at least on my machine running osx 10.4.10) the plugin got installed in the library
/Library/PhonePlugins/Nokia_N81_1v1.phoneplugin

Instead of inside the iSync.app folder.
So, simply copy the plugin contents to the iSync.app folder:
cp -r /Library/PhonePlugins/Nokia_N81_1v1.phoneplugin /Applications/iSync.app/Contents/PlugIns/ApplePhoneConduit.syncdevice/Contents/PlugIns/

and rename the Nokia_N81_1v1.phoneplugin so it used the naming convention already in the folder. On my machine this means issuing:
cd /Applications/iSync.app/Contents/PlugIns/ApplePhoneConduit.syncdevice/Contents/PlugIns/

And
mv Nokia_N81_1v1.phoneplugin Nokia-N81.phoneplugin

This brings up the synchronization, once the device have been added to iSync, follow the normal device add procedure on iSync.

I still have issues with synchronizing the phone and iTunes. But I guess I'll work this out later. As long as my calendar and contacts are in sync I can live with the music for now.

Emacs recent files

I use emacs everyday, but I still tend to forget what files I actually edited. But I found some valuable help here. A recent file function for my fav editor.

And by the way, the screenshots are done in Mac by hitting: "cmd+shift+3" and the images are stored on the desktop.

April 08, 2008

Exporting vids form iMovieHDD

Here's how to get those stop motion pictures out of iMovie HDD. Feels like a fun thing to play with don't you??

Sony Ericsson mobile emulator on linux

As a mobile developer using Slackware I often stumble over the fact that most of the major Mobile providers like Nokia, samsung, Motorola and Sony Ericsson only support the Windows platform with their development tools?? I hate this fact!

It must be possible for any of these companies to hire some one who could handle their development tools on other platfroms like Mac or Linux!

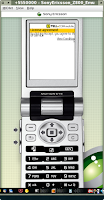
Luckily, the Sony Ericsson emulator is based on the Sun ME emulator. So I decided to get the emulator running wit my netbeans setup. So here's how to get the SonyEricsson (SE) mobile phone emulator running on a linux
box.

1. Install wine!
If you don't have a windows box with the SE installed you'll need to be
able to install the windows version of the SE emulator so you can hack the
files. This can be done using wine.

2. Install the recomended jdk and jre for the latest SE emulator in
wine You'll need jdk and jre to install the SE Emulator. Just
follow the online instalations.

3. Install the SE emulator in wine.
Point to the recently instaled jdk and jre if needed. Just
follow the online instalations.

4. Go to the SE PC_emulation directory typically placed at:
$HOME/.wine/drive_c/SonyEricsson/JavaME_SDK_CLDC/PC_Emulation

5. backup the WTK2 directory to keep the windows files just in case tar -czvf
se.tar.gz WTK2/

6. Merge the Linux kvem.jar into the Windows kvem.jar file

In the WTK2 directory with the one from the netbeans Linux
emulator. Depending on the Netbeans installation on your Linux box you'll
have to find the emulator/WTK2 directory.

My directory for the sun emulator is:
$HOME/.netbeans/5.5.1/emulators/wtk251-lin/emulator/

Then find you SE installation, mine is:
$HOME/.wine/drive_c/SonyEricsson/JavaME_SDK_CLDC/PC_Emulation

If you have Midnight commander (MC) installed. You can open the zipped jar
files directly and copy all the linux class files into the Windows version
of the jar file.

This is done by opening the kvem.jar files in their own window in MC. Each
of the kvem.jar files should be opened to the first level, having the
META_INF and com directory avaialble. Then press 'F5' in the linux version
at the com directory, remember to mark the "dive into sub directories" tap
in the copy dialog to get everythign copyed from the Linux kvem.jar file
to the windows kvem.jar file. That's it

Now if you don't have MC installed unzip both kvem.jar files into the same
directory. Firs the windows kvem.jar file should be unzipped. Then unzip
the Linux kvem.jar file into the windows kvem.jar directory and zip the
whole thing again.

It is crutial that the linux version is written ontop of the windows
version. This is for the Linux version. This is because the linux version
needs to overwrite the non platform independend java classes in the
windows file.

7. Copy all the executables from the Linux version to the Windows
version. This is done by copying every executable from the Linux netbeans
WTK2/bin/ to the PC_Emuation/WTK2/bin/

find .netbeans/5.5.1/emulators/wtk251-lin/emulator/bin/ -perm -u+x | xargs
cp -t bin

copy the file from 6.0 if you're using this netbeans version.

8. Copy all the library files from the Linux version to the Windows version
this is done by copying all the *.so files from the WTK2/bin to the
PC_Emuation/WTK2/bin/

cp $HOME/.netbeans/5.5.1/emulators/wtk251-lin/emulator/bin/*.so bin

copy the file from 6.0 if you're using this netbeans version.

9. Copy the Linux wtklib subdirectory to the windows version

if you're not there allready goto the SE windows PC_Emuation/WTK2/wtklib/
then copy the Linux directory to thisdirectory.

cp -R $HOME/.netbeans/5.5.1/emulators/wtk251-lin/emulator/wtklib/Linux .

copy the file from 6.0 if you're using this netbeans version.

10. Copy the Linux sound support library to the windows. This is done by
copying the soundbank.dsl from the WTK2/lib/ to the PC_Emuation/WTK2/lib
directory.

cp
$HOME/.netbeans/5.5.1/emulators/wtk251-lin/emulator/wtklib/lib/soundbank.dls
lib

11. Import the emulator into netbeans. See the netbeans documentation on how
to do this.

12. If you're a nice guy like me create a tarball for so everyone can use the
emulator.

mkdir se_emulator_wtklib-2.5.1
cp -R WTK2 se_emulator_wtklib-2.5.1
tar -czvf se_emulator_wtklib-2.5.1.tar.gz se_emulator_wtklib-2.5.1/

Gnome slackbuild

I miss gnome on my slackbox! I really do. Good thing I finally came across a *kewl thang* The gnome slackbuild. It was the easiest thing to install. All you have to do is follow the instruction and the configuration and you're good to go ;)

September 06, 2007

Linux on a usb drive

Today I decided to play around with Linux on a usb drive. I want slackware but could not find zip slack. So I googled a bit and found wowarea and damn small linux these boch lead me to Slax. Slax is based on slackware. So I figured I better Download it.

I installed the Slax image on my usb stick, a 4GB pleomax, unfortunately I had to use window$ for this installation :( Nevertheless, the installation went smoothely and Slax booted smothely on my first usb boot.

I then attempted to create a specific package for Slax, namely netbeans IDE as I'll have to use this in my new job. I installed netbeans on a redhat machine, yawm, and used the slackware package approach.

I installed the netbeans IDE, the profiler, the c/c++ support and the CLDC packages. I also had to install the latest JDK to get the darn thing running. See previous posts for this. Then, I created the packages from this installation. I grouped all the netbeans packages into one huge slackware package, but I'll divide these into a package each later.

Once the package was done I searched for the tgz2mo program, but couldn't find it anywhere for redhat. So I booted with the pendrive and mounted /tmp to a place on the stick with enough space, 1-2 GB.

Then, then I used tgz2mo and the package was created, I inserted the package with uselivemod and fired up the netbeans IDE. This did not start directly since it could not find JDK. I then installed the JDK module and activated netbeans with --jdk-path pointing to the JDK installation.

That fired it up, everything but the emulator worked, this was due to the same GLIBC problem as I met earlier on the redhat installation. I installed the Slax module containing the GLIBC library but that completely broke the Slax installation.

It seems like the boot attempts to install the 2.5 files so I cant boot slax now. I'll see if I can remove the GLIBC 2.5 files and boot teh darn thing again. Then I'll do a proper GLIBC package for Slax created from my fresh slackware distro.

I'll let ya know once I have it running again.

September 04, 2007

Upgrading to openoffice 2.0

Since the Linux box updating has now started I also decided to update the open office package. First I had to rid the old installation:
rpm -e openoffice.org-i18n openoffice.org-kde openoffice.org-libs openoffice.org

The above removed all openoffice 1.1 dependencies. Then the latest open office package needs to be installed:
tar -zxvf OOo_2.2.1_LinuxIntel_install_da_rpm.tar.gz

Since the installation script did not seem to work for me, I decided to use RPM to get the packages in manually. To avoid dependency problems here a one liner:
ls *.rpm |xargs rpm -ivh

Yes I like to know what is going on ;)
Now all you have to do is create the links you need for the old open office desktop links to work,
ln -s /opt/openoffice.org2.2/program/swriter /usr/bin/oowriter
ln -s /opt/openoffice.org2.2/program/scalc /usr/bin/oocalc
ln -s /opt/openoffice.org2.2/program/sdraw /usr/bin/oodraw

Finally a link to the openoffice common program:
ln -s /opt/openoffice.org2.2/program/soffice /usr/bin/soffice

That's it you're now ready for the open document standard. Have phun!? Notice, that my OO could not import the old user settings? Seems there was an error in a script file. This may very well be because my installation was way to old!

September 03, 2007

Firefox and thunderbird upgrade

Today I updated to firefox and thinderbird version 2.0. I also decided to get rid of the redhat packages as the firefox and thunderbird updates are usually distributed in tarballs . Change to superuser and then issue:
rpm -e firefox thunderbird

While you're at it remove the whole old mozilla stuff as well since it's nolonger needed. On my system I had to do:
rpm -e mozilla-devel mozilla-js-debugger mozilla-dom-inspector mozilla-mail devhelp mplayerplug-in mozilla

Notice: You can get the dependencies by issuing just rpm -e mozilla, since the dependencies will keep the rpm manager from removing the package.

To remove the rpm's, Next, get rid of the old version's entries in /usr/lib/firefox-xx and /usr/lib/thunderbird-xx by:
su -c "rm -rf /usr/lib/firefox-xxx /usr/lib/thunderbird-xx"

Now extract the latest firefox and thunderbird to the preferred location by:
tar -zxvf thunderbird-2.0.tar.gz --directory /usr/lib
tar -zxvf firefox-2.0.tar.gz --directory /usr/lib

create the links to the installed applications in the /usr/bin/ directory by:
ln -s /usr/lib/thunderbird-2.0/thunderbird /usr/bin/thunderbird
ln -s /usr/lib/firefox-2.0/firefox /usr/bin/firefox

Testing the installation:
firefox --version
Should produce something like:
Mozilla Firefox 2.0.0.6, Copyright (c) 1998 - 2007 mozilla.org

Edit:- 03 September 2007:
Just after the installation I wanted to add the new calendar support to Thunderbird, and the local weather should be viewable in my new Firefox :) I just love these small application addons

August 27, 2007

Netbeans mobility pack installation

Phew, it took a great deal of try and error before it finally managed to get installed, this was mainly because my Linux system was very outdated. I'm running on an old redhat ETP 3.0 and netbeans 5.5.1 is very new in comparison.

I had to update the glibc library to 2.4 (or above) on my system because the netbeans mobility pack emulator depend on this library. On most new distributions, like slackware 12, debian , and ubuntu this is no problem since they all use glibc version > 2.4

To install the netbeans SW on an updated system just follow these steps:

1. Change to root
su -

2. Check that you have everything
ls *.bin

jdk-1_5_0_12-nb-5_5_1-linux-ml.bin
jdk-6u2-linux-i586.bin
jdk-6u2-nb-5_5_1-linux-ml.bin
netbeans-5_5_1-linux.bin
netbeans-c++-5_5_1-linux.bin
netbeans_mobility-5_5_1-linux.bin
netbeans-profiler-5_5_1-linux.bin
sjsas_pe-9_0_01-nb-5_5_1-ml-fcs-bin-linux.bin
sun_java_wireless_toolkit-2_5_1-linux.bin


3. chmod all the binaries
ls *.bin|xargs chmod u+x

4. Install the jdk
./jdk-6u2-linux-i586-rpm.bin

The reason for using this file and not the tarball is that it actually contains rpm's. These rpm's will ensure that the netbeans installer(s) can see the new jdk you just installed.

5. Install netbeans 5.5.1 package
./netbeans-5_5_1-linux.bin

6. Install the c/c++ add on
./netbeans-c++-5_5_1-linux.bin

7. Install the profiler
./netbeans-profiler-5_5_1-linux.bin

8. Install the Mobility package The actual CLDC sdk :)
./netbeans_mobility-5_5_1-linux.bin

This way all netbean components are placed in:
/opt/netbeans/

To try netbeans IDE create a link/symlink/set the path/ or execute the file: /opt/netbeans-5.5.1/bin/netbeans

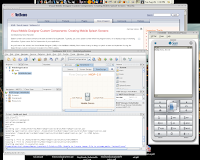
This is the final result of a generated test midlet running in the netbeans simulation environment:

My system was a modified redhat ETP, but I guess that it'll run on most rpm based machines. Perhaps I should try a slackware installation to verify everything.

Problems:
Installion went fine, so did creating a project test midlet. If you could execute the midlet and simulate it youre done. But if executing the emulator failed due to wrong GLIBC version, follow the step below as well.

I had to update glibc on my instalation to 2.4. This is not a trivial task as it may break your entire system. And yikes, the glibc 2.4 installation failed, some issues with one og the gcc compilers libraries :( So I installed the latest gcc as well. And yes it takes a while!
Read the following howto carefully.

The fast way to do this is to find the appropriate rpm's somewhere and then install these using the --nodeps option. This is because the rpm's have interdependencies that cannot be resolved.

The full expressing looks something like this:
rpm -Uvh --nodeps binutils-2.16.91.0.6-5.i386.rpm glibc-common-2.4-11.i386.rpm glibc-2.4-11.i686.rpm glibc-headers-2.4-11.i386.rpm glibc-utils-2.4-11.i386.rpm glibc-devel-2.4-11.i386.rpm gdb-6.3.0.0-1.134.fc5.i386.rpm gcc-4.1.1-51.fc5.i386.rpm gcc-c++-4.1.1-51.fc5.i386.rpm

Notice the above is quite rough on your system.! You can actually break the systems stability if you do not resolve all the dependencies for all the packages.

August 22, 2007

Grep

I sometimes forget the syntax, so in order not to forget heres a link to one of the best Linux blogs available: Grep magic

PS3 the wonderfull new toy

Just in, PS3, damn what a fine piece of machinery. After spending many evening as a lego starwars character or as a Member of the Corleone family I decided to get the PS3 to run as a Multimedia center. Here's how get the PS3 running as a Hd recorder with a small USB TV input device.

February 06, 2007

DVD, AVI and the rest of the video world

A long time ago when I bought my first DVD player here in Denmark I didn't need to worry about regions. Since the law of my contry did not bother about these things. We simply allowed all regions as we where a free country.

On a vacatin to the US of A I bought a number of DVD's that I found interesting , good and could not get as region 1 movies. Besides most European movies has been rated differently and are therefore not the original movie once they are released in Europe.

Then I bought a new DVD player, but something had changed! We where no longer a free country, the regions on our players where locked! So all my movies could now lolonger be played on my new DVD player. Why????

I decided to start converting them to something I could watch on my mac and my new player. For this I needed a good tool. The darwinport's Handbrake seemed like the answer to my call. I then changed the region on my mac for 1 and started ripping all my dvd's from the US one by one.

Then I needed a good player that handled all videoformats. I found the VLC player. This player took all my troubles away. It plays AVI, VOB and what ever you could imagine.

Why WMA files for gods sake?

This Xmas I bought a song on the web. The hit of this Xmas. But I cannot play it om my mac because the file is in WMA format.

How stupid! Why cant these distribution sites use a regular format like mp3???

I wanted to listen to my new song, so I started looking for some converter tools so I could listen to my newly bought song. I found switch.

Apparently I wasen't the only one with the problem, since Dave taylor knew. Thanks Dave.

August 21, 2006

TOR

I got sick and tiered of internet commercials!!! I hate those commercials. I got tiered of internet statistics and server traffic. So I decided to install TOR.

This beautiful distributed network tool is no less than fantastic. Ok my bandwidth is reduced a bit, but the reduction is worth it, since you rid all the crap.

After the installation in Firefox and Thunderbird the world has become much more anomymous ..... Ahhhh the commercial free life.

February 18, 2006

ScummVW

Speaking of good clean family entertainment you can trust!

Need I say more?

Well ok DOTT and of course the world known game comic Day After the Day of the Tentacle. Most of the world famous Lucas Art Games are now known as Abandonware. This means that you can get them for free.

I downloaded a couple of Monkey Island from this place www.downloadcentral.dk. They have most of the famous ones. Problem is though they are all packed in the ACE format.

Luckily this is ported with darwinports, so sudo install grace will dump the much appreciated unpacker on your box.

When it's done you should be able to unpack you ownloaded game by:
unace e monkey.ace I created a directory for each game I downloaded, and extracted the game in there. Then I added the game to scumVM.

Subversion & mail man

A long forgotten tool is the command line mail, I decided to start using it again for sending attachments. As this is much neater.

Then I decided to write a block entry here but someone bet me to it: 'SHELLdorado - Sending files as mail attachments'. SHELLdorado is a great resource for shell stuff.

With nothing better to do I decided to read the latest Linux Journal, especially the Subversion article. Rumor has it that subversion will be replacing cvs.

I'm not that big a user of cvs but I decided to have a look at subversion and use for handling my general set up on both my powerbook and my office linux box.

sudo port install subversion ...... Did I mention I'm in love with Darwinports? Then simply follow the article to create repository, or just read the Subversion documentation.

February 09, 2006

The Gimp Deux

I need the gimp, luckily darwinports.org has a resent port of gimp2, and you can install it by typing:
sudo port install gimp2
Wait .......... Once the installation is done typing:
gimp
in a shell'll launch the application. Now you want to set your own splash screen. I choose mine from the GIMP 10th Anniversary Splash Contest. Just dump the splash image as
~/.gimp2.2/gimp-splash.png
There's loats more configuration for the gimp where that came from check the Gimp man page for details.

I found, however, that my XDarwin application needed a good window manager instead of 'just' using TVM, which it is born with. So, I installed Oroborus for Mac. This gives the nice transparent frames just like Tiger.... Grrrr...

All I had to do was to change to my preferred key mapping from the USA.xmodmap to DK.xmodmap. Then Orobrus was good to go. With all the work related issues ready I guess I'm ready to go else where, it's entertainment time: scumVM